
マイクテスト
このオンラインマイクテストツールを使用して、マイクの動作を確認およびテストします。
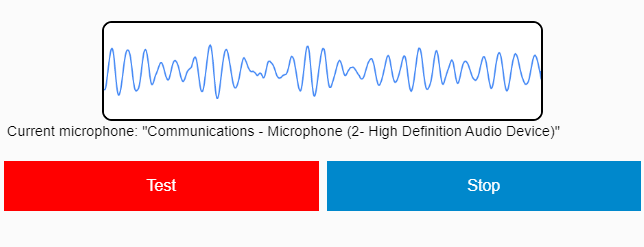
手順 (マイクテスト用):
- クリック 'テスト' ボタン。
- ブラウザに質問が表示された場合は、[許可]をクリックしてください。
- これで、マイクを通して話すときに線が移動するはずです。
ラインが音に反応している場合、それはマイクが機能していることを意味します!
当社のマイクテストツールはどのように安全に使用できますか? - (お客様のプライバシーは当社にとって非常に重要です)
当社のマイクテストツールはプライバシーに基づいて実行されます。 "クライアント側" – これは、マイクテストチームがあなたのさまざまな音声やその他の種類の情報を録音しないし、録音できないことを意味します。
マイク テスト ツールの使用で問題が発生していますか? マイクを適切にテストするには、さらにお読みください。
このツールを使用してオンラインでマイクテストを行うことはできませんか?マイクテストを簡単に行うためのステップバイステップガイドを次に示します。
*初めてマイクテストサイトにアクセスした場合、または履歴をクリアした後に、ブラウザから、このサイトにマイクへのアクセスを許可するように求められます。 [オンラインマイクテストの実行を許可する]を選択します。
* PC /ラップトップをお持ちの場合、この質問は画面上部のアドレスバーのすぐ近くにあるはずです。
*ええと、モバイルデバイスをお持ちの場合は、一番上までスクロールしてください。選択するように見えます 許可する.
* 次に、ツールにマイク テストを実行させるために、マイクで何かを言ってみてください。これで、マイクが音を聞くたびに、テスト ボックス領域でラインが上下に動くのが確認できるはずです。次のようになります。
*マイクに向かって話したり話したりするときに線が上下に動くのを見ることができれば、オンラインマイクテストは成功です。マイクが正しく構成されています。
マイクテストのトラブルシューティングガイド
マイクへのアクセスを許可した後、回線が表示されない場合は、次の手順を試してください。
ステップ1。 場合によっては、マイクのテスト中に線が表示されないことがあります。この場合、マイクに向かって比較的大きな声で話し、線が表示されるかどうかを確認します。
ステップ2。 ページを更新して、再試行してください。ほとんどの場合、問題のトラブルシューティングを行います。
ステップ3。 上記の両方の手順を実行してもマイクが機能するかどうかわからない場合は、マイクがデバイスに正しく接続されているかどうかを確認してください。
線が見えるのに線が動いていない場合は、マイクが壊れているか、正しく設定されていません(可能性が高くなります)。
問題を解決するには、次の手順を試してください。
ステップ1。 WebブラウザとしてSafariを使用している場合は、このマイクテストWebサイトをGoogle Chrome、MicrosoftEdgeなどの別のブラウザで開く必要があります。
ステップ2。 次に、マイクがラップトップ/コンピューターの正しい(通常はピンク色の)ソケットに接続されていることを確認します。 USBコネクタ付きのマイクの場合は、USBのソケットが正しく接続されているか確認してください(この場合、ピンク色のマイクは使用しないでください)。
ステップ3。 次に、マイクがミュートされていないことを確認します。
ステップ4。 大事なことを言い忘れましたが、マイクの音量レベルが上がっていることを確認してください。
オンラインでマイクテストを実行しようとしましたが、それでもマイクが機能しませんか?ここにあなたのためのいくつかの解決策があります:
Windows7またはWindows10のマイクが機能していませんか?オペレーティングシステムのマイク設定を簡単にトラブルシューティングして、マイクを正常に動作させることができます。
Windows10でマイク設定を変更する方法
macOSでマイク設定を変更する方法
Windows8でマイク設定を変更する方法
Windows7でマイク設定を変更する方法
Ubuntu(Linux)でマイク設定を変更する方法
オンラインマイクテストの詳細
このサイトを使用してオンラインマイクテストを実施する利点は何ですか?
SkypeやDiscordなどのアプリケーションを使用している場合、それらのマイクテスト機能は役に立たない可能性があり、マイクが機能するかどうかわからない可能性があります。これらのアプリケーションはさまざまな目的のために設計されているため、マイクテストをうまく行うことができませんでした。
ただし、オンラインマイクテストツールを使用すると、マイクを数秒で簡単にテストして、マイク接続の問題を即座に除外できます。
ソフトウェアで行われるマイクテストの問題は何ですか?
ソフトウェアでマイクをテストすると、マイクの音が聞こえていないように見える場合の問題は、問題がソフトウェアにあるのか、マイクにあるのかがわからないことです。
一部のソフトウェアでマイクが機能しない場合はどうすればよいですか?
この Web サイトでオンライン マイク テストを実行でき、マイクが機能していることがわかったものの、サードパーティ ソフトウェアで問題が発生する場合は、そのソフトウェアのサポート チームに連絡することをお勧めします。
問題をすばやく修正するには、themictest.comでマイクが正常に機能していることを伝えてください。
あなたもすることができます ウェブカメラをテストする Skypeのようなビデオ録画ベースのアプリケーションを使用している場合。
Discordに最適なマイクを探しています - ここをクリック.
あなたのガジェットで最も高価なマイクかどうか? ここで最も高価な7つの世界をチェックしてください-マイク