MIC TEST

Verwenden Sie dieses Online-Mikrofontest-Tool, um die Funktion Ihres Mikrofons zu überprüfen

Anweisungen (Für Mikrofontest):

  1. Drücke den 'Prüfung' Taste.
  2. Klicken Sie auf "Zulassen", wenn im Browser eine Frage angezeigt wird.
  3. Jetzt sollte sich die Linie bewegen, während Sie durch Ihr Mikrofon sprechen!

Wenn die Leitung auf Geräusche reagiert, bedeutet dies, dass das Mikrofon funktioniert!

b

How our Online Mic Test Tool is Safe to Use?- (Your Privacy Is Very Important To Us)

Our Mic test tool runs on privacy based i.e the “client side” – it means that the mic test team do not and can not record your different voices or any other type of information.

Haben Sie Probleme mit dem Online-Mikrofontest? Lesen Sie weiter, um Ihr Mikrofon richtig zu testen.

Können Sie mit diesem Tool keinen Mikrofontest online durchführen? Hier ist eine Schritt-für-Schritt-Anleitung, die Ihnen hilft, den Mikrofontest einfach durchzuführen.

* Wenn Sie die Mikrofontest-Site zum ersten Mal oder nach dem Löschen Ihres Verlaufs besucht haben, werden Sie von Ihrem Browser aufgefordert, dieser Site den Zugriff auf Ihr Mikrofon zu erlauben. Wählen Sie Zulassen, um einen Online-Mikrofontest durchzuführen.

* Wenn Sie einen PC / Laptop haben, sollte diese Frage ganz in der Nähe der Adressleiste oben auf Ihrem Bildschirm stehen.

* Nun, wenn Sie ein mobiles Gerät haben, scrollen Sie ganz nach oben. Es wird angezeigt, auszuwählen Erlauben.

* Versuchen Sie nun, etwas in Ihr Mikrofon zu sagen, damit unser Tool den Mikrofontest durchführen kann. Sie sollten dann eine Linie sehen können, die sich im Testboxbereich nach oben und unten bewegt, wenn Ihr Mikrofon einen Ton wie diesen hört –

 eine sich bewegende Linie als Reaktion auf den Ton vom Mikrofon


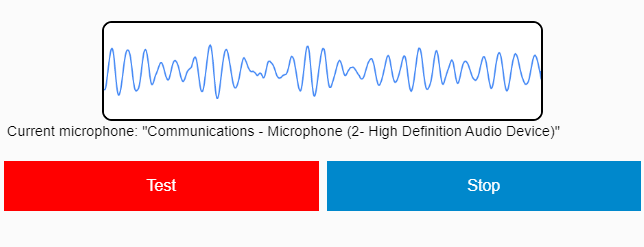
* Wenn Sie beim Sprechen oder Sprechen in Ihr Mikrofon sehen, dass sich eine Linie nach oben und unten bewegt, ist Ihr Online-Mikrofontest erfolgreich. Ihr Mikrofon ist richtig konfiguriert.

Mic Test Trouble-Shooting Guide

Wenn Sie nach dem Zugriff auf Ihr Mikrofon keine Leitung sehen können, versuchen Sie die folgenden Schritte:

Schritt 1. In einigen Fällen sehen Sie beim Testen Ihres Mikrofons keine Linie. Sprechen Sie in diesem Fall relativ lauter in das Mikrofon und sehen Sie, ob die Linie erscheint.

Schritt 2. Aktualisieren Sie die Seite und versuchen Sie es erneut. In den meisten Fällen behebt es das Problem.

Schritt 3. Wenn Sie nicht wissen, ob Ihr Mikrofon funktioniert, nachdem Sie die beiden oben aufgeführten Schritte ausgeführt haben, überprüfen Sie bitte, ob Ihr Mikrofon richtig an Ihr Gerät angeschlossen ist.


Wenn Sie eine Leitung sehen können, sich die Leitung jedoch nicht bewegt, ist Ihr Mikrofon entweder defekt oder nicht richtig eingerichtet (mehr Chancen).

Versuchen Sie diese Schritte, um das Problem zu lösen:

Schritt 1. Wenn Sie Safari als Webbrowser verwenden, sollten Sie diese Mikrofontest-Website in einem anderen Browser wie Google Chrome oder Microsoft Edge öffnen.

Schritt 2. Stellen Sie als nächstes sicher, dass Ihr Mikrofon an die richtige (normalerweise rosa) Buchse Ihres Laptops/Computers angeschlossen ist. Wenn es sich um ein Mikrofon mit USB-Anschluss handelt, prüfen Sie, ob es sich um eine richtig angeschlossene USB-Buchse handelt (Bitte verwenden Sie in diesem Fall nicht das rosa Mikrofon).

Schritt 3. Stellen Sie als Nächstes sicher, dass Ihr Mikrofon nicht stummgeschaltet ist.

Schritt 4. Stellen Sie zu guter Letzt sicher, dass die Lautstärke am Mikrofon aufgedreht ist.

Sie haben versucht, den Mikrofontest online durchzuführen und Ihr Mikrofon funktioniert immer noch nicht? Hier sind einige Lösungen für Sie:

Funktioniert Ihr Windows 7 oder Windows 10 Mikrofon nicht? Nun, Sie können Ihre Mikrofoneinstellungen in Ihrem Betriebssystem problemlos beheben und Ihr Mikrofon funktioniert einwandfrei.

So ändern Sie die Mikrofoneinstellungen in Windows 10
So ändern Sie die Mikrofoneinstellungen in macOS
So ändern Sie die Mikrofoneinstellungen in Windows 8
So ändern Sie die Mikrofoneinstellungen in Windows 7
So ändern Sie die Mikrofoneinstellungen in Ubuntu (Linux)

Erfahren Sie mehr über den Online-Mikrofontest

Welchen Vorteil hat die Durchführung des Online-Mikrofontests über diese Site?

Wenn Sie Anwendungen wie Skype oder Discord verwenden, ist deren Mikrofontestfunktion möglicherweise nicht hilfreich und Sie wissen möglicherweise nicht, ob Ihr Mikrofon funktioniert. Diese Anwendungen sind für unterschiedliche Zwecke konzipiert und konnten daher den Mikrofontest nicht gut bestehen.

Mit unserem Online-Mikrofontest-Tool können Sie Ihr Mikrofon jedoch in Sekundenschnelle testen, um Probleme mit der Mikrofonverbindung sofort auszuschließen.

Was ist das Problem beim Mikrofontest mit Software?

Das Problem beim Testen Ihres Mikrofons mit einer Software, die Ihr Mikrofon nicht zu hören scheint, besteht darin, dass Sie nicht sicher sein können, ob das Problem an der Software oder Ihrem Mikrofon liegt.

Was soll ich tun, wenn mein Mikrofon in einigen Softwareprogrammen nicht funktioniert?

Wenn Sie den Online-Mikrofontest auf dieser Website durchführen konnten und festgestellt haben, dass Ihr Mikrofon funktioniert, es jedoch immer noch Probleme mit Software von Drittanbietern verursacht, empfehlen wir Ihnen, sich an das Support-Team dieser Software zu wenden.

Stellen Sie sicher, dass Sie ihnen auf themictest.com mitteilen, dass Ihr Mikrofon einwandfrei funktioniert, damit Ihr Problem schnell behoben wird.

Du kannst auch teste deine Webcam wenn Sie Anwendungen wie Skype verwenden, die auf Videoaufzeichnungen basieren.

Probleme mit der Webcam, die unter Windows 10 nicht funktioniert – Klicken Sie hier für die Lösung.

Auf der Suche nach dem besten Mikrofon für Zwietracht – Klicke hier.

Die teuersten Mikrofone in Ihren Gadgets oder nicht? Sehen Sie sich hier die 7 teuersten Mikrofone der Welt an

FAQs

What are some common microphone issues that a test can identify?

  • Distortion: This occurs when the microphone is overloaded and the audio signal becomes distorted. A test can identify whether the audio output is clean or if there is any distortion.
  • Background noise: This issue occurs when there is unwanted sound picked up by the microphone. A test can identify the level of background noise and whether it is acceptable or too high.
  • Popping or clicking sounds: This can occur when a speaker pronounces certain syllables or letters too forcefully, causing a popping or clicking sound. A test can identify whether the microphone is susceptible to this issue.
  • Feedback: This occurs when the audio output is fed back into the microphone, resulting in a high-pitched squeal. A test can identify whether the microphone is susceptible to feedback and how to prevent it.
  • Volume issues: This occurs when the microphone volume is too low or too high, making it difficult to hear the audio output. A test can identify whether the volume level is appropriate for the intended use.
  • There may be other issues that can be identified through testing, but these are some of the most common ones.

How often should I perform a microphone test?

The frequency of microphone testing depends on how frequently the microphone is used and the criticality of the application it is being used for. In general, it is a good practice to perform microphone tests regularly to ensure that they are functioning properly and to identify any issues before they become major problems.

For example, if the microphone is used in a professional setting such as a recording studio or for live performances, it is recommended to perform tests before every recording or performance session. This can help identify any issues that may impact the quality of the recording or performance.

If the microphone is used in a less critical setting such as for personal use, then testing it once every few months may be sufficient.

It is also important to perform tests after any changes have been made to the microphone or its setup, such as changing the location of the microphone or adjusting the volume. This can help ensure that the microphone is still functioning properly after any modifications.

Overall, it is a good practice to perform microphone tests regularly to ensure that they are functioning properly and to identify any issues before they become major problems.

Can I perform a microphone test on my smartphone or computer's built-in microphone?

Yes, you can perform a microphone test on your smartphone or computer’s built-in microphone. In fact, it is a good practice to test the built-in microphone periodically to ensure that it is functioning properly.

On a smartphone, you can use a voice recorder app or a video recording app to record your voice or other sounds. Then, you can play back the recording and listen for any issues such as background noise, distortion, or volume issues. Some smartphones also have a built-in microphone testing feature that allows you to test the microphone directly.

On a computer, you can use the built-in recording app or a third-party recording app to record your voice or other sounds. Then, you can play back the recording and listen for any issues such as background noise, distortion, or volume issues. Some computers also have a built-in microphone testing feature that allows you to test the microphone directly.

It is important to note that the quality of the built-in microphone can vary greatly depending on the device and its settings. If you require high-quality audio, you may need to invest in an external microphone.

What steps can I take to improve my microphone's performance based on the test results?

  • Improve positioning: If the test shows that your microphone is not picking up sound evenly across different frequencies, try adjusting its position. Move it closer or farther away from the sound source, or try pointing it at a different angle. This can help improve the microphone’s frequency response.
  • Adjust sensitivity: If the test shows that your microphone is picking up too much background noise, try adjusting its sensitivity. Lowering the gain or volume can help reduce background noise while still capturing the desired sound.
  • Improve noise reduction: If the test shows that your microphone has a low signal-to-noise ratio, try using noise reduction techniques such as gating, filtering, or using a noise reduction plug-in. This can help reduce background noise and improve the clarity of the desired sound.
  • Reduce distortion: If the test shows that your microphone is producing unwanted distortion, try lowering the gain or volume, or using a pop filter or windscreen to reduce plosives or wind noise.
  • Choose the right directional pattern: If the test shows that your microphone is not picking up sound from the desired direction, consider choosing a different directional pattern. For example, if you need to capture sound from multiple directions, an omnidirectional microphone may be more suitable than a cardioid microphone.

It is important to note that some microphone problems may require more advanced solutions or even replacement of the microphone. If you are unsure how to address issues identified in the test, consider consulting with a professional audio engineer or contacting the microphone manufacturer for support.

Can a microphone test help with issues like echo or background noise?

Yes, a microphone test can help identify issues like echo or background noise that are affecting the microphone’s performance. In fact, many microphone tests include measurements of the microphone’s signal-to-noise ratio and its ability to reject background noise.

Echo is typically caused by reflections of sound waves bouncing off surfaces in a room and returning to the microphone. A microphone test can help identify the presence of echo by analyzing the decay time of the sound signal after it is captured by the microphone. If echo is detected, the solution may involve adjusting the microphone’s position or using acoustic treatments like sound-absorbing panels or curtains to reduce the amount of reflection.

Background noise can be caused by a variety of sources, including other people talking, air conditioning, traffic, or electronic interference. A microphone test can help identify the presence and characteristics of background noise, such as its frequency spectrum and its level relative to the desired sound. Solutions to reduce background noise may involve using noise reduction techniques like gating, filtering, or using a noise reduction plug-in, or using a different microphone that is better at rejecting noise.

In general, a microphone test is a useful tool for identifying issues that are affecting the quality of the captured sound. By understanding the causes of these issues, it is possible to take appropriate steps to improve the microphone’s performance and ensure that the desired sound is captured with the best possible quality.

Are there any common mistakes to avoid when performing a microphone test?

Yes, there are several common mistakes to avoid when performing a microphone test to ensure that the results are accurate and reliable. Here are some of the most important mistakes to avoid:

  • Using improper equipment: Using equipment that is not suitable for microphone testing, such as low-quality cables, amplifiers, or preamps, can introduce noise or other artifacts that can affect the test results.
  • Not following standardized procedures: Microphone testing often involves following specific procedures or guidelines to ensure consistency and accuracy. Not following these procedures can lead to inconsistent or inaccurate results.
  • Testing in a poor acoustic environment: Testing a microphone in a poor acoustic environment, such as a room with high reverberation or ambient noise, can affect the test results and make it difficult to accurately measure the microphone’s performance.
  • Improper microphone placement: Placing the microphone in an improper position or angle relative to the sound source can affect the test results and lead to inaccurate measurements of the microphone’s frequency response, directional characteristics, and sensitivity.
  • Not allowing the microphone to warm up: Some types of microphones require a warm-up period before they can deliver accurate and reliable sound quality. Not allowing the microphone to warm up before testing can affect the test results and make it difficult to accurately measure its performance.

By avoiding these common mistakes and following proper procedures, it is possible to ensure that the microphone test results are accurate and reliable, and that the microphone is delivering the best possible sound quality.

de_DEDE