
Windows 7 Mic Not Working
How to check if your mic is working, and if not fix the settings.
Here are some possibilities. Please follow the case similar to your problem and you will be sent to the appropriate solution in the guide.
Case 1: You just want to check if your mic is correctly configured in Windows 7.
Case 3: Your mic is visible in the settings, but there are no green bars moving when you speak.
Case 4: Your mic is not visible in the settings.
If you can’t decide which case you have to choose, just follow the guide and at some point, your problem will be solved.
Case 1: You just want to check if your mic is correctly configured in Windows 7.
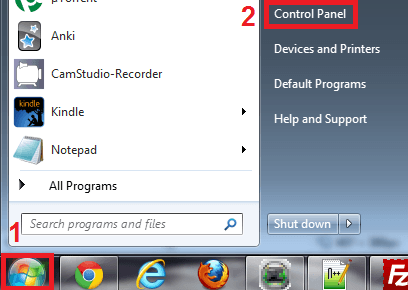
Step 1: Click on the Windows logo in the bottom-left corner to open the start menu, and then open “Control Panel“.
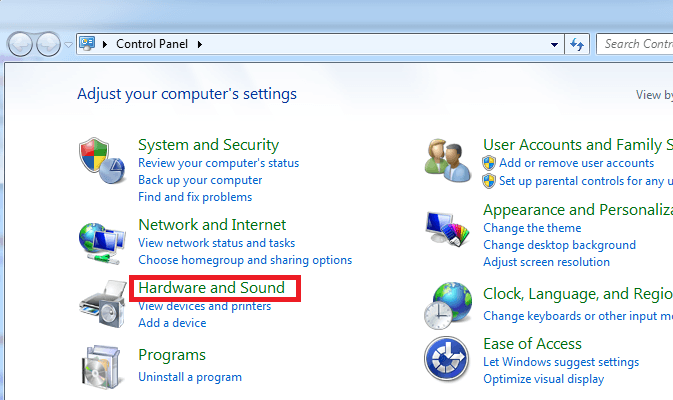
Step 2: Click on “Hardware and Sound” option.
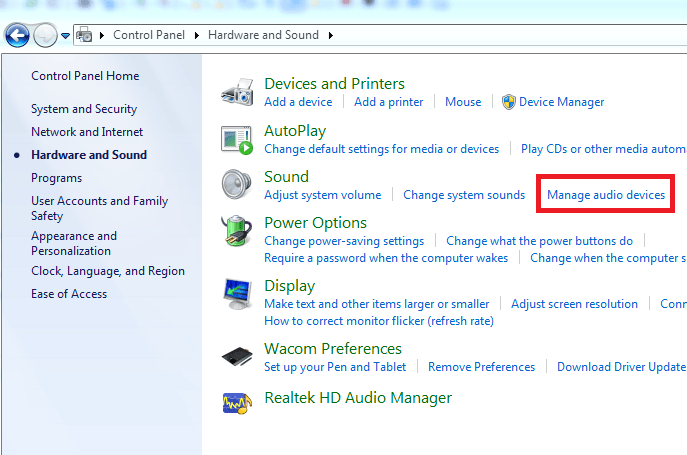
Step 3: In the “Sound” section of Hardware and Sound, click on “Manage audio devices”.
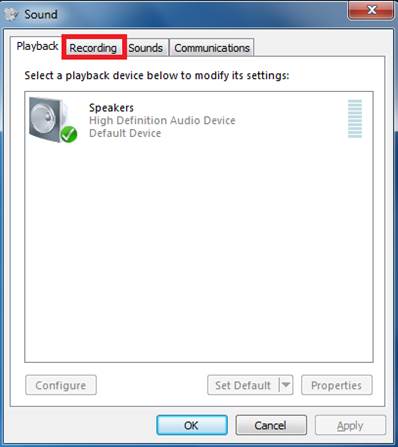
Step 4: Click on the “Recording” tab and check recording devices available.
Step 5: Now you can see a list of your recording devices( Microphones ). Try speak into your mic and look for green bars moving when you speak.
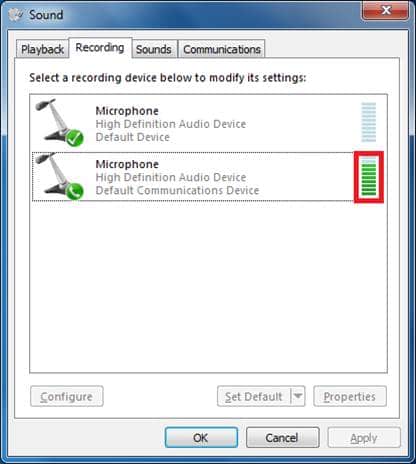
Step 6: If you see green bars moving when you speak, that means your mic is properly configured.
Case 2: You see green bars moving in the mic settings, but your computer doesn’t seem to detect any sound.
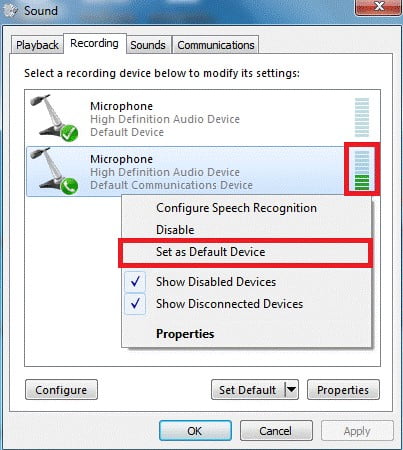
If your mic does show green bars moving but still can’t capture any sound, make sure it is selected as your default device or you can select it as a default device by right-clicking on it and then “set as Default Device“.

Case 3: Your mic is showing in the list, but there are no green bars moving when you speak.
Step 1: See if you can check which one of the devices in the list is your mic. Follow the next instructions for that one. If you’re not sure which device is your mic, follow the instructions for all the devices one by one.
Step 2: Click on the relevant device to select it, and then click on “Set as Default Device”
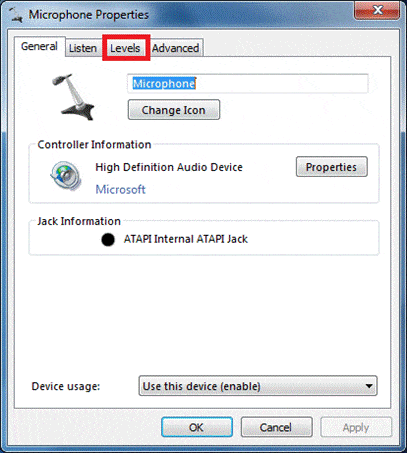
Step 3: Double-click on the selected device and a new window will open up .In that window, click on the “Levels” tab.
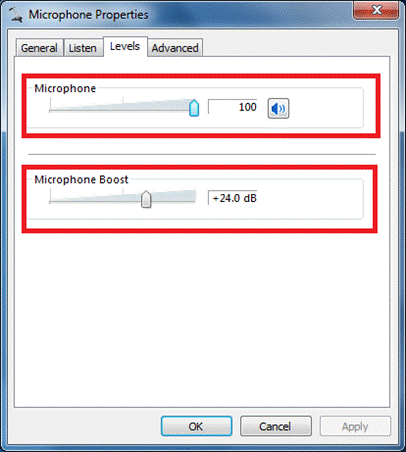
Step 4: Move the “Microphone” slider all the way to the right, until the max level ‘100’ is displayed beside it. You can also move the “Microphone Boost” slider to increase the gain.
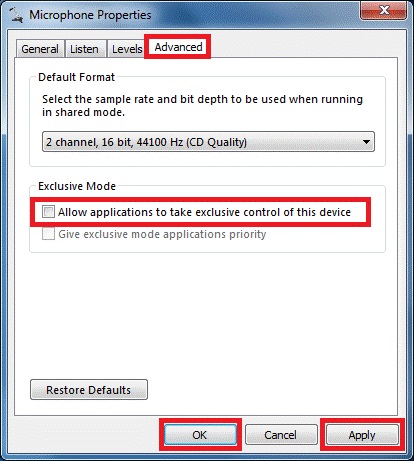
Step 5: Now click on the “Advanced” tab (right most) and uncheck the option “Allow applications to take exclusive control of this device”. By doing this no application has permissions control over your microphone and able to mute it. Then, click “Apply” then “Ok”.
Step 6: Now check again to see if the green bars are moving when you speak into the mic; if they are moving, your mic is now correctly configured. If your microphone is still not working in some program or applications, means Windows is configured correctly and can “hear” through your microphone, but the program or application you’re using can’t. (to check that, test your microphone with our mic test tool. Sometimes the program or application you’re using might be listening to the wrong microphone. Try to explore their audio settings and change its default recording device. If the microphone is still not working with the program, try reinstalling it or contact their support.
Case 4: Your microphone is not showing in the settings.
In this case, the problem is either your microphone is not added in the list, or there is a problem with your audio driver of the recording device.
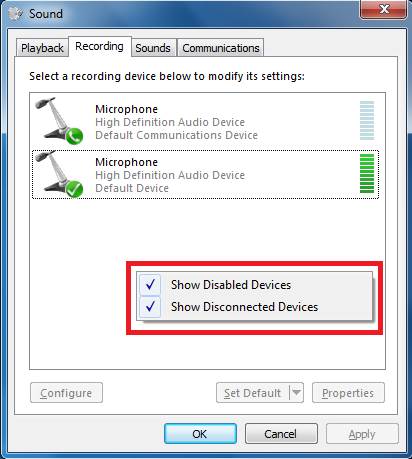
Let’s start with adding all your recording devices to the list, even they are disabled. Right-click the empty area in the recording devices and a pop-up will pop out, enable both “Show Disabled Devices” and “Show Disconnected devices“.
If a new microphone shows up, give it a try by selecting it as default microphone. The second possibility might be a problem with your audio driver ( recording device ). We can start troubleshooting the audio settings and if this doesn’t work, we can then reinstall the driver. Here is how to troubleshoot audio driver in order to solve the problem:
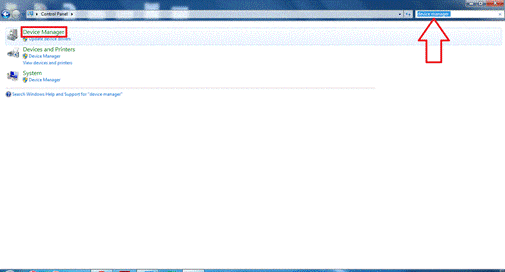
Step 1: Open Control Panel from the start menu.

Step 2: Search and open “Device Manager“
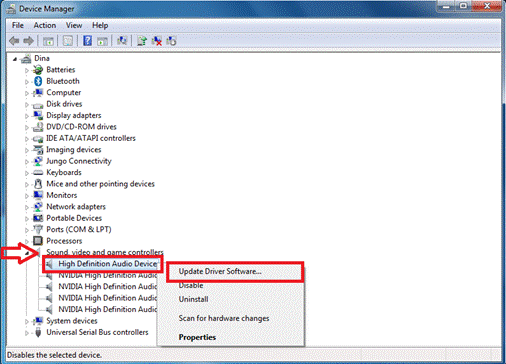
Step 3: In Device Manager window, expand “Sound, video and game controllers“, right-click on “High Definition Audio device” and click “Update Driver Software …“
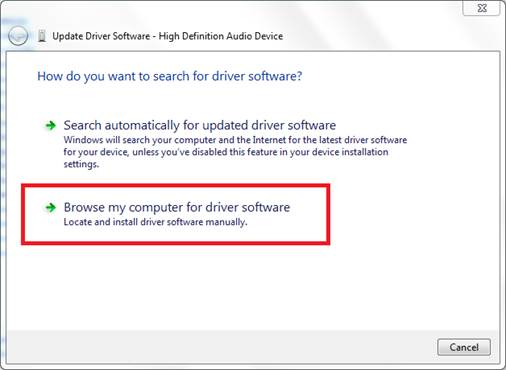
Step 4: Now select “Browse my computer for driver software“.
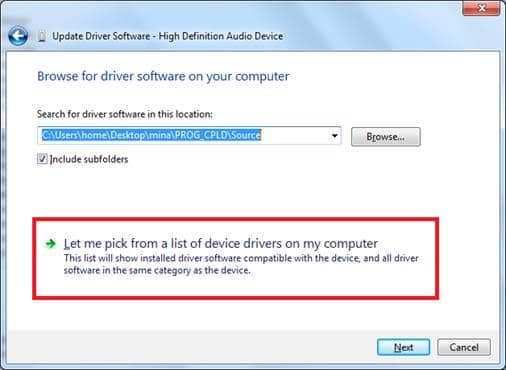
Step 5: Below this, select the option: “Let me pick from a list of device drivers on my computer“.
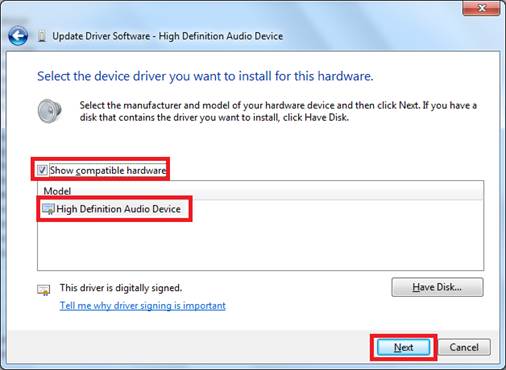
Step 6: Check “Show compatible hardware“, then select “High Definition Audio Device” and click “Next” button.
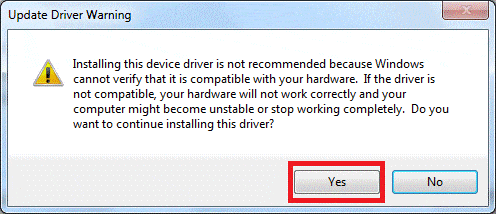
Step 7: If you get this warning in popup window, just click “Yes”.
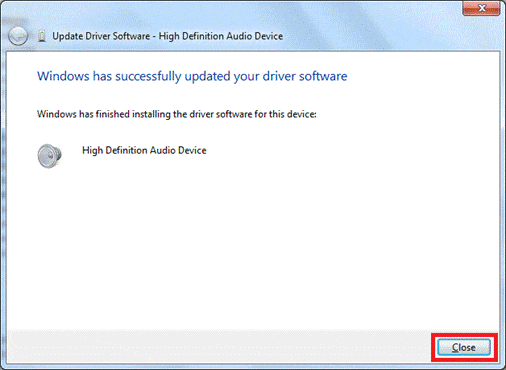
Step 8: Now, the driver is successfully installed or updated and now click “Close”.
Step 9: It’s highly suggested that you should restart your computer after any driver changes beacause some changes will not take place until you restart your laptop or PC.
Facing issues with Sound – Click Here for the solution.
Facing issues with webcam – Click Here for the solution.
Facing issues to record audio on your Mac or Laptop or iPhone or Android. Click here for solution