
Mac OS Mic Not Working?
Figure out how to check if you are using a microphone at your Mac and how to fix if the mic is not working well.
There are many issues that can make a microphone not work as expected. This varies depending on the type of mic and the software that is currently trying to use it with. This guide will cover the most widely recognized issues that Mac clients experience and their answers. This guide was updated for the latest version of macOS 10.15 Catalina (previously known as OS X).
Solution 1: Adjusting Microphone Settings
Solution 2: Resetting the PRAM/NVRAM
Solution 3: Creating a New Account
Solution 4: Turning on Dictation
Solution 5: Fixing App Permissions
Solution 6: Entering Safe Mode
Follow the steps to find what is the problem and how to fix it
Solution 1: Adjusting Microphone Settings
Regularly the most straightforward approach to fix issues with the microphone is simply to change the sound settings in System Preferences. Here’s the ticket:
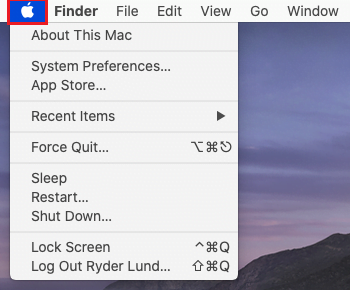
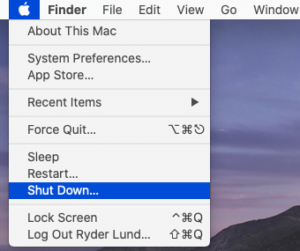
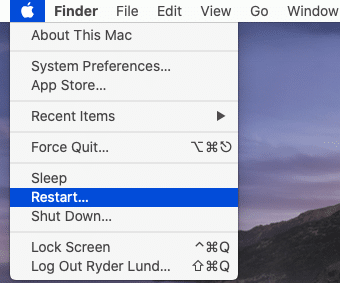
Step 1: Click the Apple symbol present in the upper left corner of the screen. A menu will show up as demonstrated in the picture on the right:
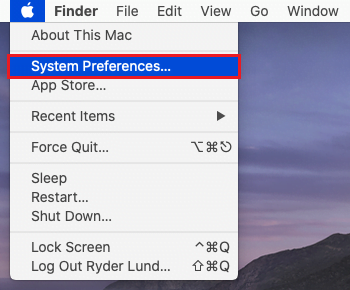
Step 2: Click on System Preferences.
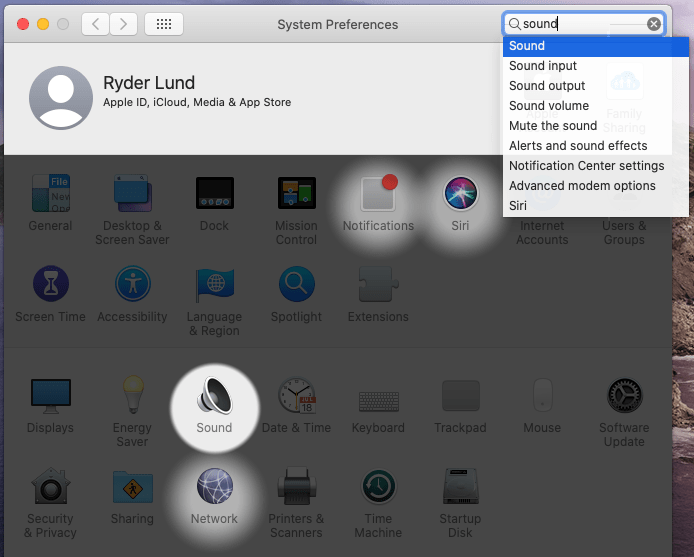
Step 3: Under system preferences need to select Sound by clicking it. It can also be done via typing in the search text box.
Step 4: Under Sound select the Input tab.
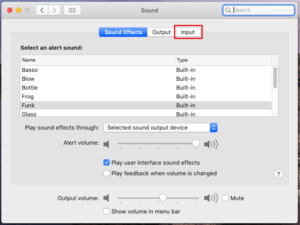
Step 5: The list of recording gadgets or devices will show up. Ensure to choose the gadget or device you are attempting to utilize. In the event that it’s the inherent or built-in mic, select “Internal microphone”. If you are using a USB mic or headset, it ought to be named all things considered. In the event that you have a mic or headset connected to the line in port, select “Line in”.
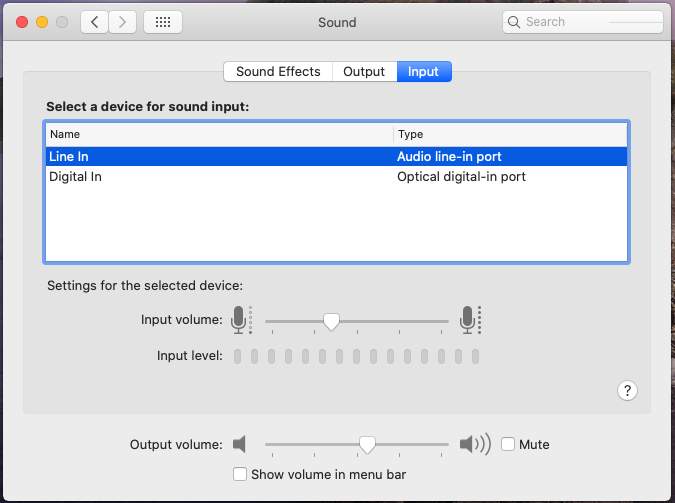
Step 6: Now share voice with the microphone, and search for bars moving alongside Input Level. (you can check the screen shot for your easy reference.)
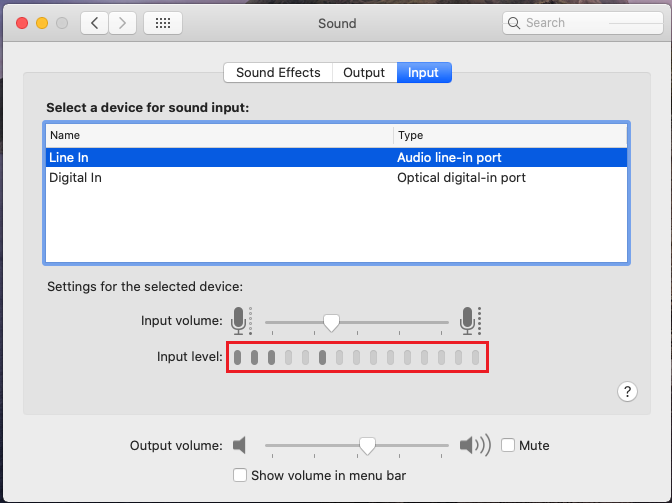
Hopefully bars start rising while you are talking. It implies your microphone is appropriately arranged (What are the things to do if the microphone is correctly configured (bars moving when talking in the Mic) but it is not working in some Program?)
If the problem still persists, that means bars are not rising while you are talking into the mic, continue to adhere to the further directions.
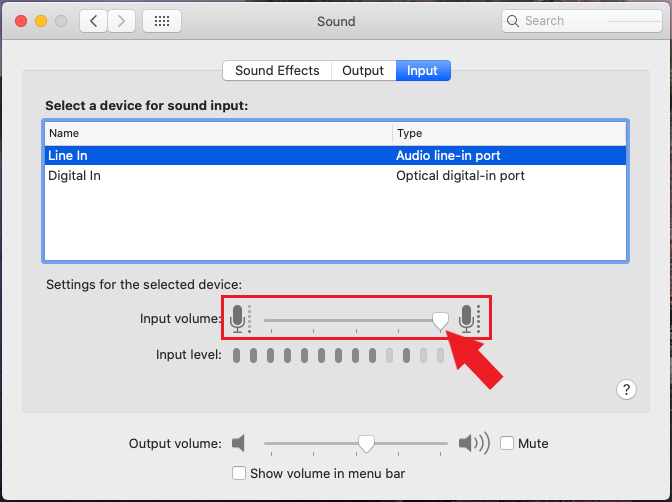
Step 7: Drag the slider right to one side, to set the maximum volume. You can check again. Now you can see bars rising when you talk into the microphone. If no, follow further instructions.
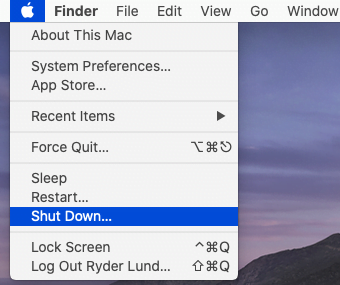
Step 8: Open the menu from the icon of the apple from the top left corner and shut down the machine. Start it again. By this way the settings are saved and help to resolve temporary microphone issues.
If the problem still persists, then you can attempt more arrangements, such as creating a new account or resetting the PRAM.
Solutions 2: Resetting the PRAM/NVRAM
Apple macOS – PRAM (parameter random-access memory) or NVRAM (nonvolatile random-access memory) stores certain settings. Resetting PRAM/NVRAM can fix issues with those settings. For this situation, volume settings for the mic or microphone.
Step 1: Shut down the Laptop / Computer from the Apple symbol. Now start it again from the keyboard.
Step 2: Press and hold the Command (⌘), Option, P and R. All 4 buttons together immediately after Start.
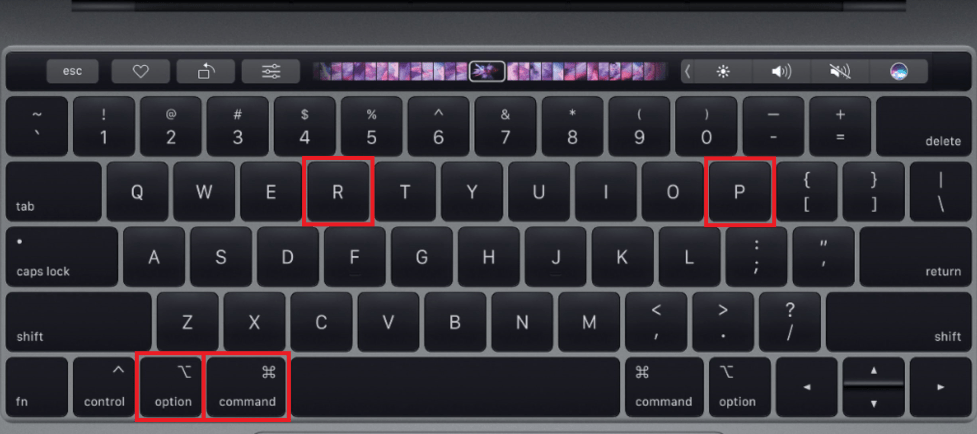
Continue to hold the 4 keypad buttons until the PC / Laptop restarts. You hear the start sound once more or the Apple logo appears and disappears again. It should take around 15 – 25 seconds.
Step 3: Once done resetting the PRAM/NVRAM you should reconfigure the amplifier settings. Return to the start of this guide and follow stages 1-8 of Adjusting Microphone Settings again to test the mic.
In the wake of marking back on to your Mac and checking the settings once more, ideally your mic will currently be working. If not, there’s even more answers for attempt, such as making another record.
Solution 3: Creating New Account
In some cases the issue with the mic can be with settings explicit to your account. Making another account which is new helps to tackle the situation.
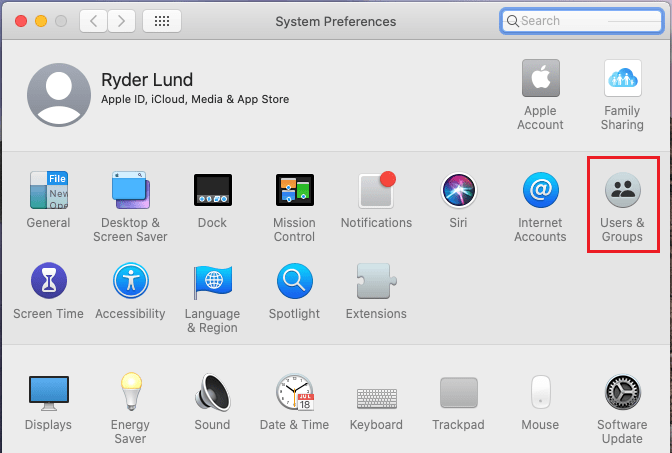
Step 1: As earlier shared, click the Apple symbol in the upper left corner of the screen and afterward on System Preferences.
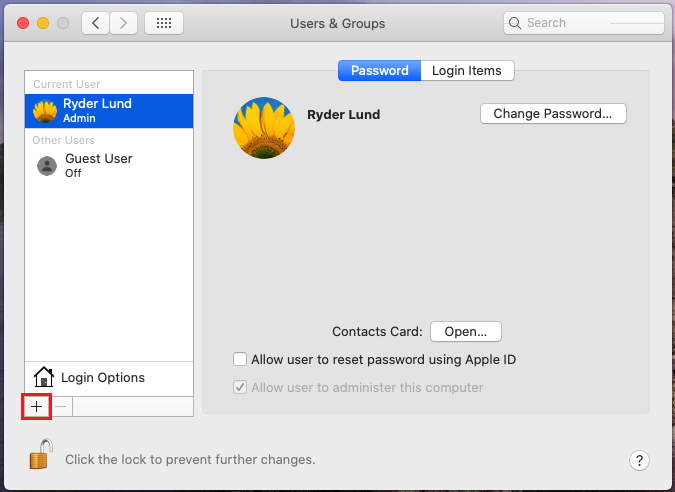
Step 2: In System Preferences, click on the User and Groups icon. It is shown in the image.
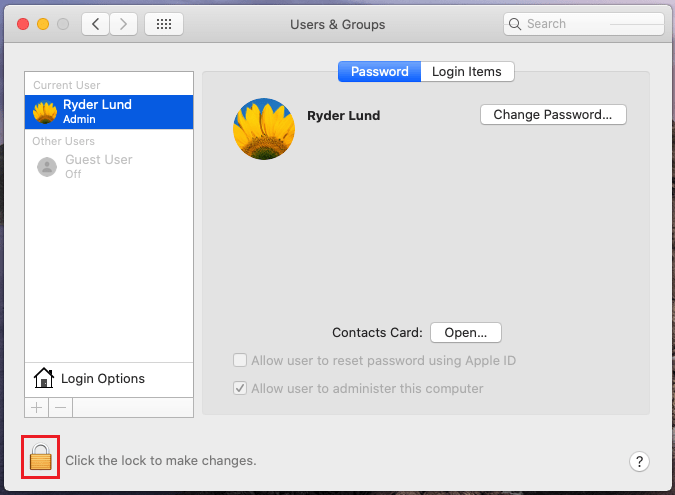
Step 3: The Users and Groups will open. Click on the lock symbol to permit making changes.
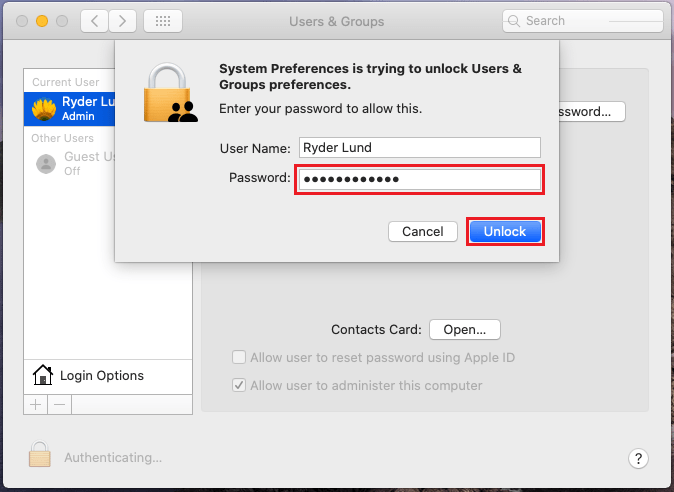
Step 4: A Pop up window will come. Need to enter your password. Once Entered the password click on Unlock.
Step 5: Once the changes are allowed, click on the + button.
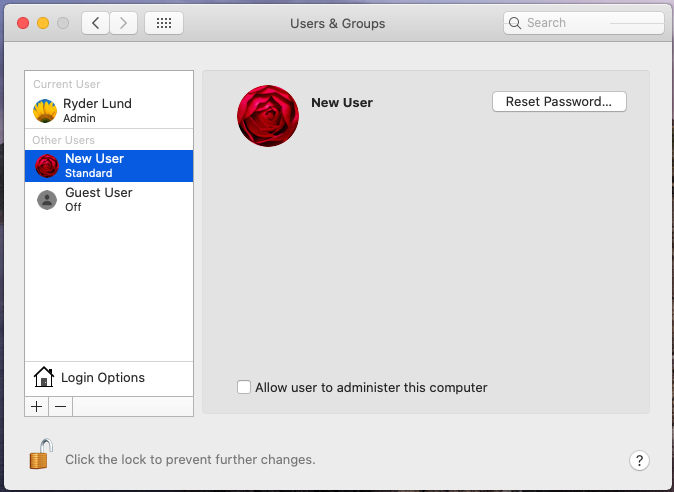
Step 6: A Pop will come to create a new account. Add name and password of your own choice and remember it. Click on Create User. New user is created.

Step 7: Log out from the current user. Login to newly created account. Don’t use Fast User Switching.
Step 8: After Log-in test the mic. (Follow Steps as per Solution 1).
If the problem still persists, move on to the next step.
Solution 4: Turning on Dictation
Turning on the Dictation feature, regardless of whether you don’t plan to utilize it, can start things that actuate your microphone and make it work once more. Certain files which are currently not available or deleted will be downloaded.
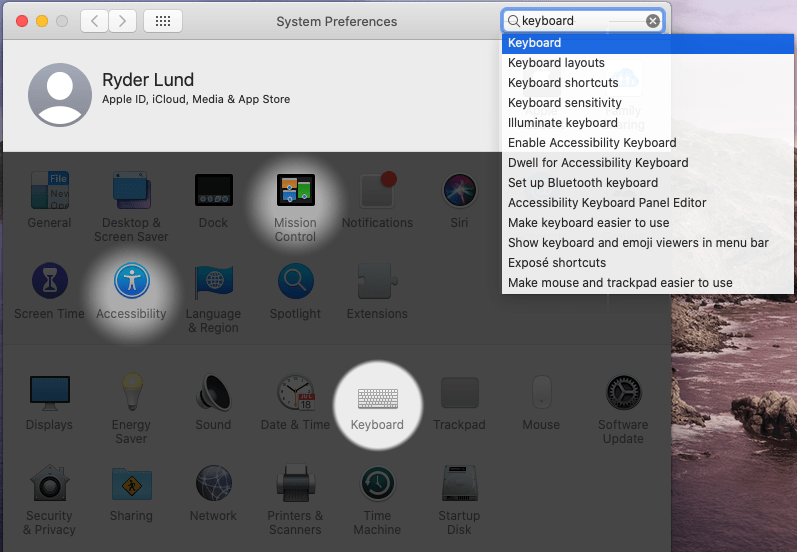
Step 1: Click the Apple symbol present in the upper left corner of the screen and afterward on System Preferences.
Step 2: Now select Keyboard either by clicking it or via looking for it in the inquiry text box.
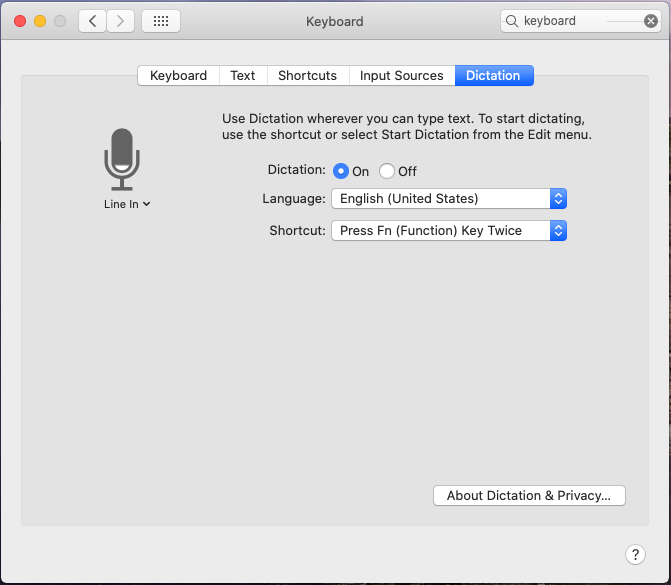
Step 3: In the Keyboard window search for the Dictation tab and snap or click on it.
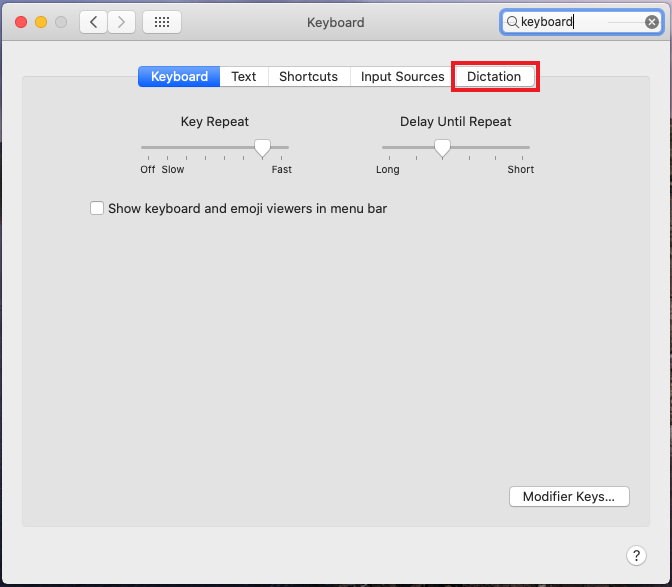
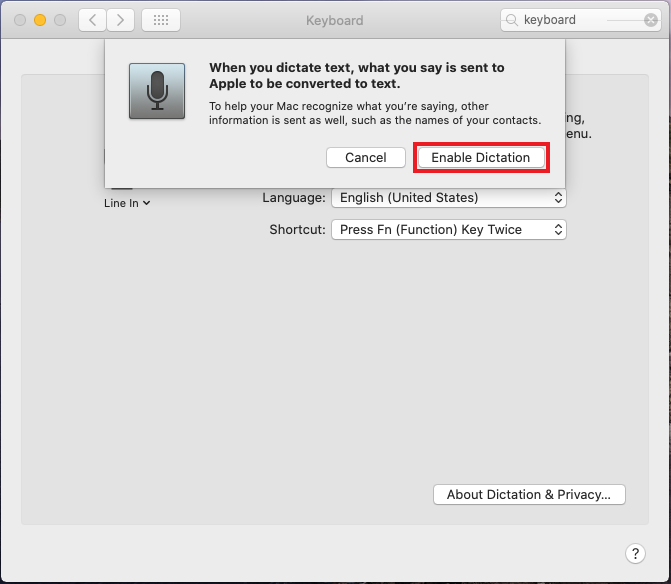
Step 4: A popup window will come. It clarifies that empowering transcription will send information to Apple. In the event that you approve of this, click Enable Dictation.
Step 5: Dictation is currently empowered. All pertinent records for dictation and microphone ought to have downloaded and initiated, ideally permitting to utilize it. You should see the level on the microphone symbol change as you talk into it.
If the problem still persists, move on to the next step.
Solution 5: Fixing App Permissions
In case you’re experiencing difficulty utilizing your mic with a specific program or application, the application authorizations might be the issue. You can change or check these in System Preferences.
Step 1: As earlier shared, click the Apple symbol in the upper left corner of the screen and afterward on System Preferences.
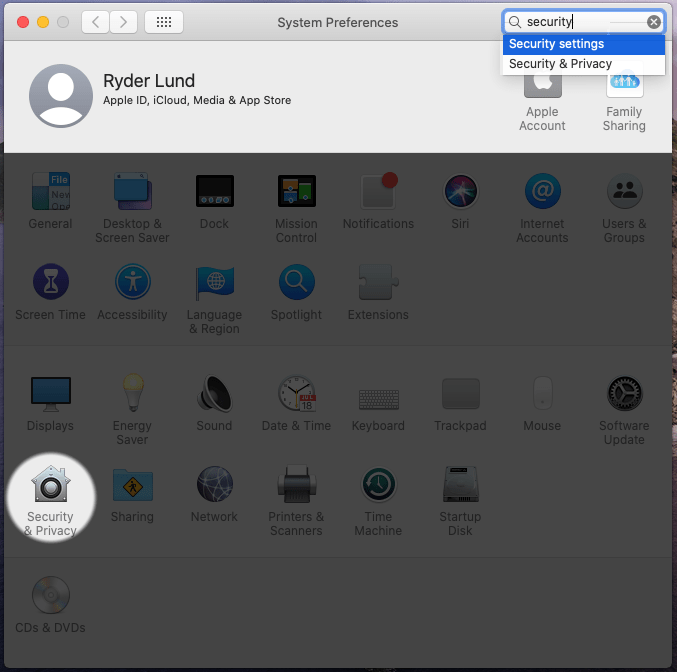
Step 2: From System Preferences go to Security and Privacy by tapping on it or search from the search box.
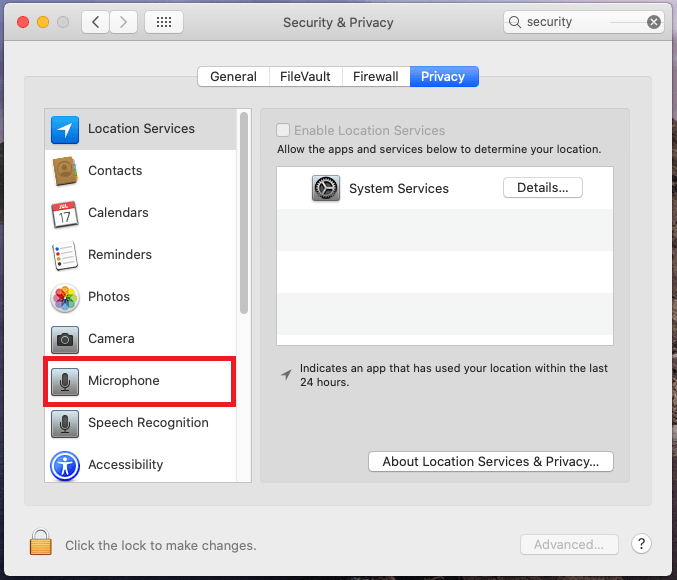
Step 3: Now click on the Privacy tab.
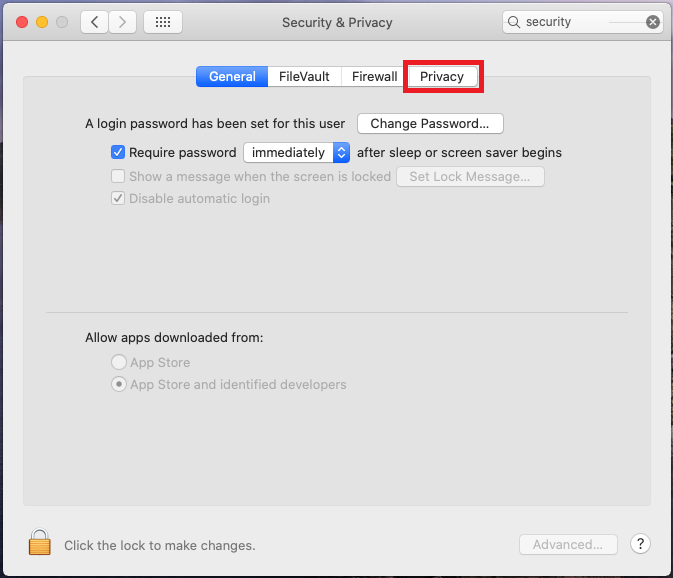
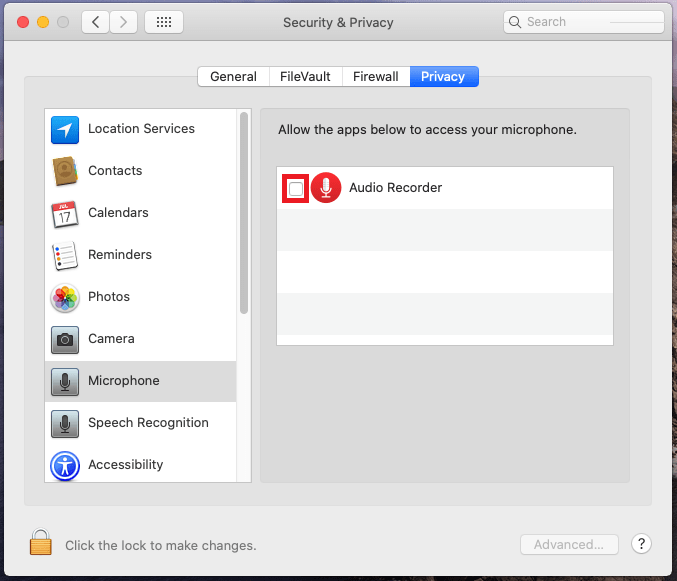
Step 4: In security settings, click on Microphone. You should now see a rundown of applications that approach or access the mic.
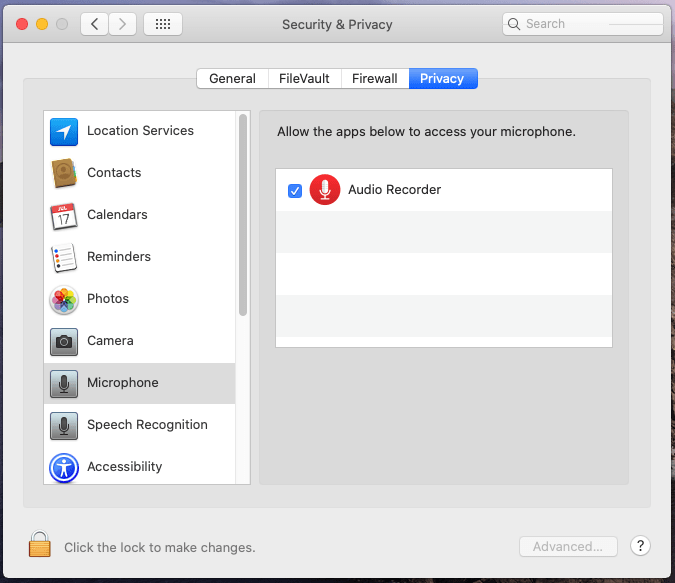
Step 5: Click the check mark close to the one you need to utilize. If the App is already selected or checked, do uncheck or deselect. Now click the check mark again.
Step 6: Once the application you expect to utilize is selected you can exit. Now use the mic with that application.
If the problem still persists, you have to uninstall and reinstall the App. If you don’t know how to do this or it doesn’t work, you may have to contact that application’s help.
Solution 6: Entering Safe Mode
Restarting your Mac into protected or safe mode (or safe boot) can help fix certain issues, including mic issues. Here how to do as such:
Step 1: Shut down your Mac
Step 2: Start mac. Hold the Shift key. Continue to hold it until the login screen comes up.

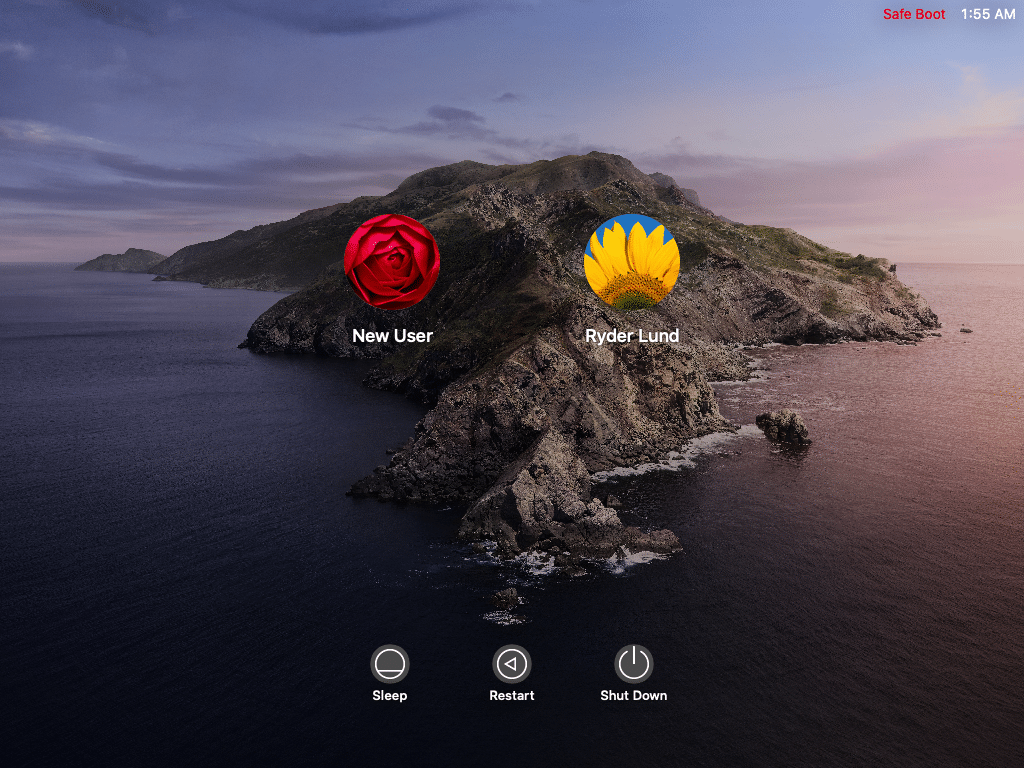
Step 3: When the Login screen comes up you should see Safe Boot in the upper right corner. Sign it to your account and macOS ought to be in Safe Mode or Safe Boot.
Step 4: Check whether mic is working by utilizing the application you need to or checking the rising bars or levels or changing colors in Audio or Dictation from System Preferences.
Step 5: Restart Mac in normal mode. (Follow Steps as per Solution 1)
If the problem still persists, after checking mic in normal mode, then the issue may be with hardware. There may be yet another issue with your OS that this guide didn’t cover. You can take a stab at going to the Apple Support Communities or straightforwardly contact Apple for additional help.
Solution 7: What are the things to do if the microphone is correctly configured (bars moving when talking in the Mic) but it is not working in some Program?
Assuming you could see bars moving when talking into the mic, it implies that it is designed effectively. Mac can hear properly. To confirm that utilization you can check from our website home page.
The program you are attempting to utilize, notwithstanding,
- Not configured in the right way.
- listening to the wrong microphone
- volume is excessively low.
Change the program’s settings. If the problem persists, try with uninstalling then reinstalling the program. If the problem still persists, contact the software support team.
Facing issues to record audio on your Mac or Laptop or iPhone or Android. Click here for solution.
Facing issues with Sound – Click Here for the solution.
Facing issues with webcam – Click Here for the solution.